【Mechanical Design】🛠️ 03. How to Combine GUI CAD and Code-Based Design — Minimal Code Design with FreeCAD
topics: [“mechanical design”, “cad”, “freecad”, “python”, “design philosophy”]
🧭 Introduction
Taking one step beyond GUI-based CAD,
there is an approach in which design is described as code.
The next question that almost always comes up is:
“How do you actually write that code?”
In this article, we introduce a minimal first step:
- Organizing design intent in plain language
- Expressing that intent directly as code
The key point here is not AI or automation itself,
but that design decisions remain explicitly preserved in code.
🎯 What We Will Do in This Article
This article focuses on
experiencing code-based design with the smallest possible setup.
- Organize design conditions and decisions in text
- Express them as Python code
- Paste and execute the code in FreeCAD
- Use CAD only for confirmation and visualization
This is not about learning GUI operations.
🧠 What It Means to Create Design Code
When people hear “code-based design,”
they often imagine complex APIs or heavy frameworks.
That is not the essence.
What actually matters is:
- Defining dimensions as variables
- Making conditions explicit using if statements
- Writing placement and structure as rules
In other words,
you simply write down, as code,
the same decisions you already make in your head as a designer.
✍️ Organizing Design Intent in Words
Before creating any geometry,
first organize the design intent in plain language.
As an example, consider the following design:
- A part with plate length, width, and thickness
- If the plate is long, increase its thickness
- Mounting holes are placed symmetrically
At this stage,
we are not using CAD or Python yet.
🔄 Translating Design Intent into Code
Based on the organized design intent,
we express it as Python code.
The key point here is that
the design decisions themselves are encoded.
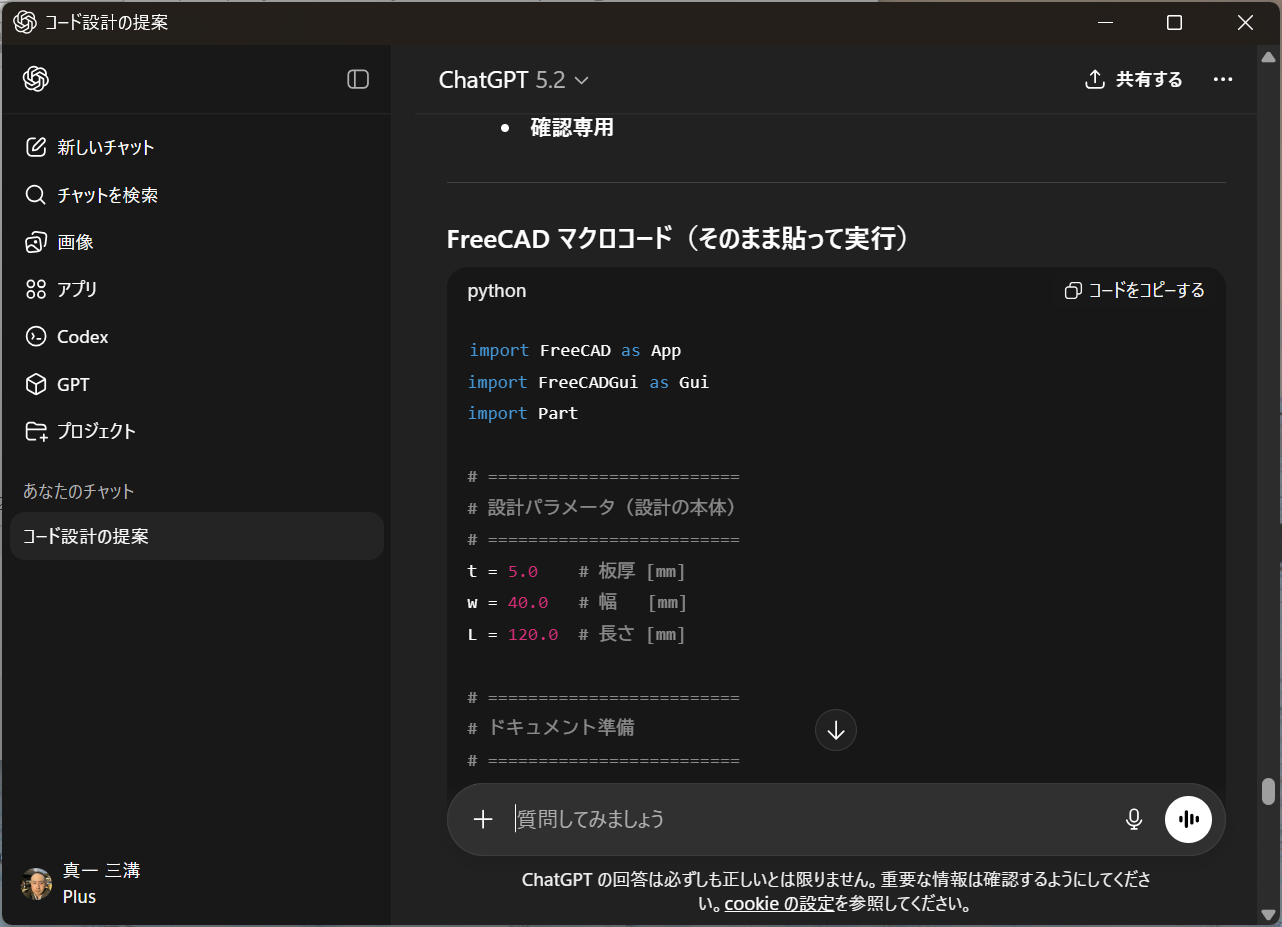
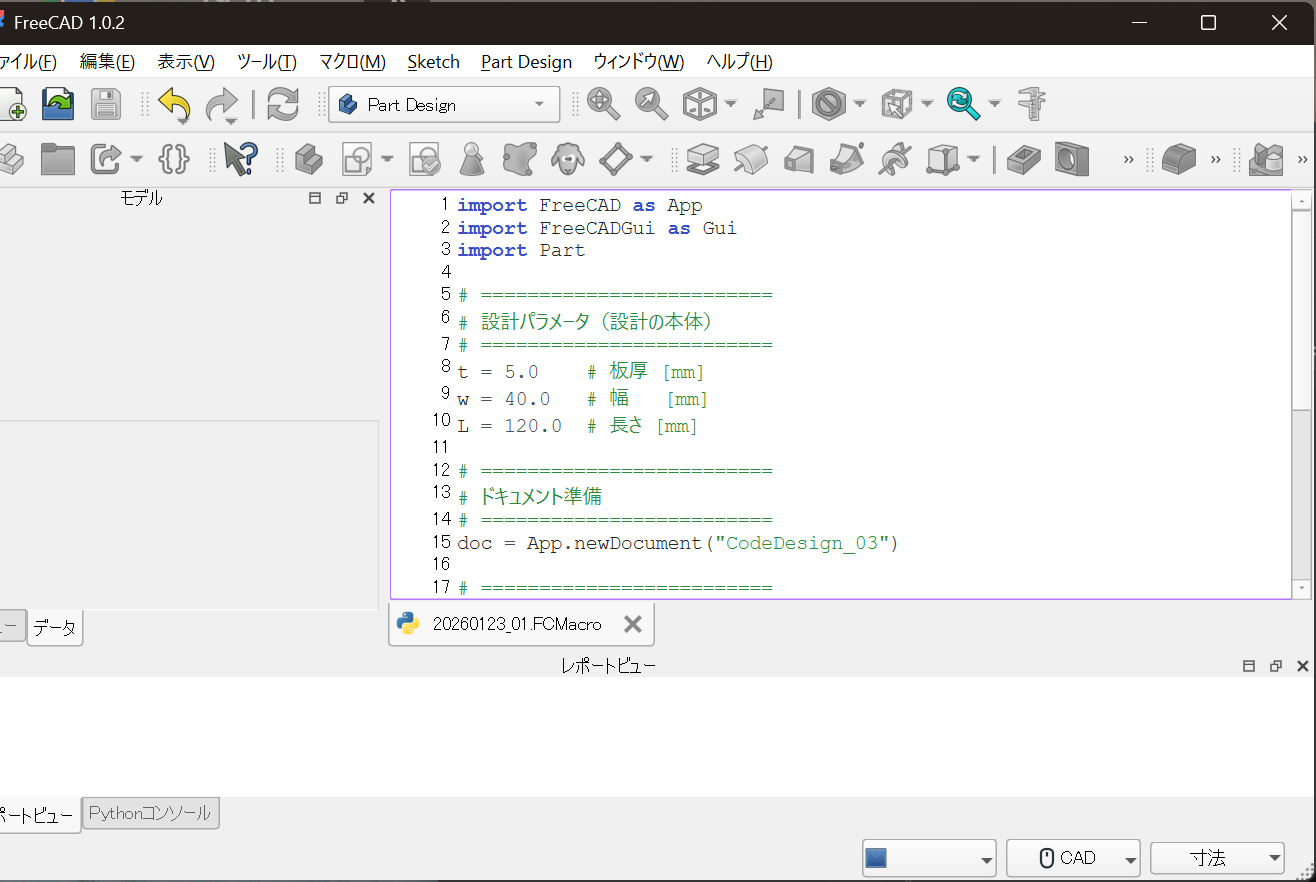
🧩 Pasting into a FreeCAD Macro
Paste the generated code into
FreeCAD’s Macro Editor.
At this point:
- No sketches
- No constraints
- No feature operations
are used at all.
🧪 Example: Design Decisions Preserved in Code
For example,
a decision to switch plate thickness based on length
can be written as:
if L > 100:
    T = 8.0
else:
    T = 5.0
With just these few lines:
- The condition
- The resulting change
are clearly and explicitly recorded.
In GUI CAD,
this kind of decision tends to disappear
into a sequence of operations.
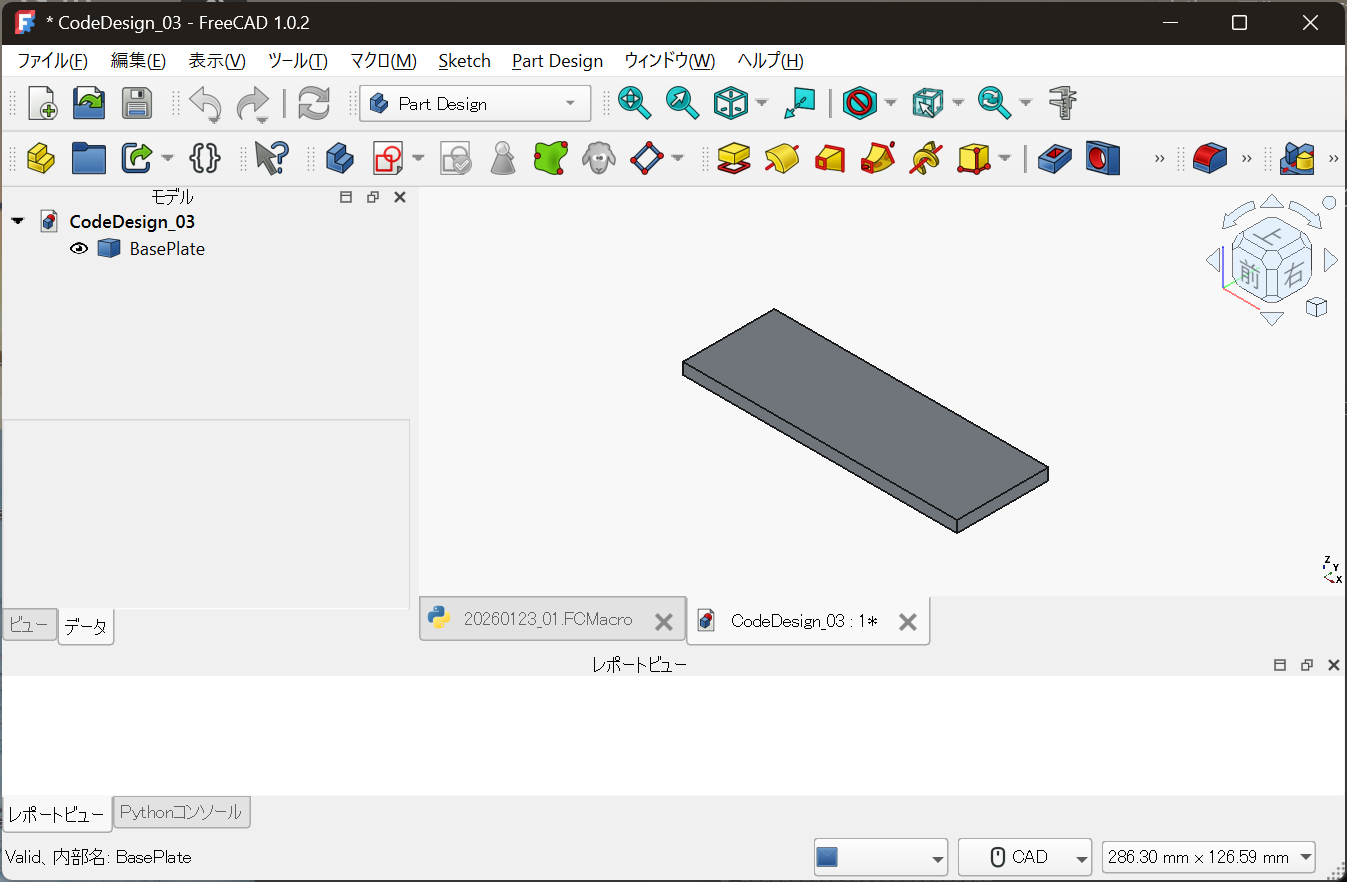
👀 Execution Result Without GUI Operations
When the macro is executed,
a shape is generated based on the design rules.
- Re-run = redesign
- Dimension change = derivative design
- No operation history required
At this point, FreeCAD behaves not as a drawing tool,
but as a viewer for the execution result of code.
🖥 The Role of GUI CAD Does Not Disappear
This approach does not reject GUI CAD.
GUI remains indispensable for:
- Visual inspection
- Interference checking
- Intuitive understanding of shape
What changes is simply:
Where the core of the design lives
🧱 Positioning of Minimal Code Design
This approach is not about:
- Converting everything into code
- Fully automating all design work
Instead, it is about:
- Design conditions
- Design decisions
- Rules you want to reuse
Moving only those parts worth preserving as differences into code.
🏁 Conclusion
To start code-based design,
you do not need a large environment or drastic tool changes.
- Organize design decisions in words
- Translate them into code
- Confirm the result in CAD
With just this small step,
design begins to shift from a one-off task
to a reusable design asset.
Next, we will cover:
How to introduce code-based design without abandoning Part Design
📎 Notes on Code Usage
The code shown in this article is illustrative,
intended to explain the design methodology.
For reusable design code and licensing information,
please refer to the following repository: